
#11 Makeup Steps For Oily Skin [Must-Follow]
The biggest struggle for people with oily skin is applying makeup that will last longer and won’t give off the unwanted shine. You might have tried a lot of things to make your skin less oily, but let us tell you one thing – “That’s your true skin, don’t ruin it in the process of making it better.”
So, what can you do? Here at De’lanci, our professional makeup artists suggest using makeup products that are made specifically for oily skin. They have together created a blog with makeup steps for oily skin. With this guide, you will be able to pull off the wedding look without having to worry about the unnecessary shine on the face.
Without any delay, let’s move ahead with the makeup steps for oily skin. Wait till the end, we have also added the bonus tips for you.
Makeup Steps for Oily Skin
Step 1: Cleanse Your Face
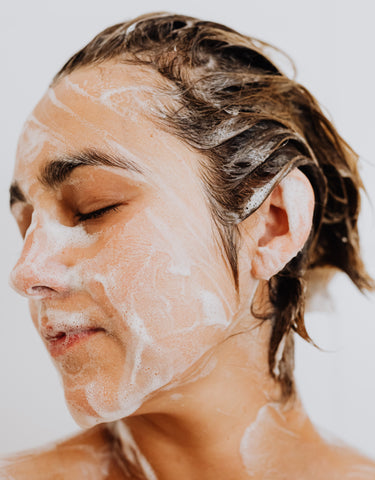
Before you start applying makeup, make sure you are prepping your skin for it. Whether you have oily skin or the normal one, this is a must-follow step. Use cleanser to clean your face, then apply toner. This won’t only clean and exfoliate your skin but will also help it stay hydrated.
Step 2: Moisturize Your Skin

Now fix your toner in the skin with moisturizer. Pick up a moisturizer that has SPF in it, so that it can protect you from harmful sun rays and make it look oilier.
Step 3: Apply Matte Primer

Just primer won’t do. Go for the matte primer if you have oily skin. It will prevent your makeup from melting down. When purchasing a matte primer, go for the powdered form, or the liquid primer with no oil content in it. Don’t forget to prime your eyelids as well.
Step 4: Apply BB Cream

Apply BB cream to protect your skin from getting too oily and melting down your makeup. BB cream has SPF in it, which can make your skin tone even so that you can apply more makeup without having any cakey effect left behind.
Step 5: Conceal Flaws

You can’t conceal the truth, but you can at least conceal the flaws on your face, right? For skin that's free of dark circles, red marks, and blemishes, choose the right concealer. Add the light layer of concealer.
Step 6: Apply Foundation

Now, it’s time to apply foundation. Choose the foundation shade as per your skin shade. Apply it on the skin with the makeup brush for a flawless look. Go for the matte or airbrush finish foundation instead of glossy.

Step 7: Ace the Eyebrow Game

Now, it’s time to ace up your brow game by defining your eyebrows with a brow pencil. Define a brow shape with the pencil, fill it, and finish up with the brow gel for the perfect look. It won’t be necessary for everyone. If you already have defined eyebrows that frame your face gorgeously, you are good to go!
Step 8: Apply Eyeshadow

Which makeup ends without the application of eyeshadow? You have already prepped up your eyes for the eyeshadow, choose the right eyeshadow palette for your look. If you are getting ready for the wedding season, the glitter and shiny palette will catch your attention. Apply eyeshadow with keen focus!
DE'LANCI 54 Color La Catrina Eye shadow

Step 9: Finish Eye Makeup
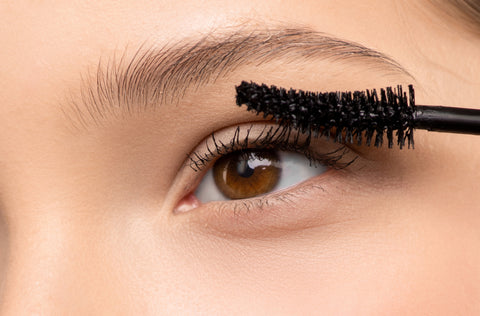
Applying eyeshadow isn’t enough to create an appealing eye look. If you really want to look gorgeous, finish the eye makeup with mascara, eyeliner, and kajal. The end result will be damn satisfying for you and everyone to watch.
Step 10: Apply Lipstick

After eye makeup, there comes lipstick. However, before applying lipstick, apply lip balm and wait a couple of minutes before applying lipstick.

Step 11: Use Setting Spray

After applying lipstick, use the highlighter to highlight the nose bridge, cheekbones, chin, and cupid’s bow. Give a blush effect on your cheeks and the makeup is done. To set the makeup in place, use a setting spray. It will prevent smudging and melting of the makeup from your face.
Bonus Makeup Tips for Oily Skin
In the above section, you read about the simple makeup steps for oily skin. Here in this section, you are about to get some bonus tips on how to maintain the makeup on oily skin throughout the day. Let’s get going then!
- Do not forget to prime your face before applying any makeup product.
- Always carry blotting papers, i.e., soft tissue papers with you to remove the excess oil from the skin.
- Use a setting spray after using primer and concealer to avoid oily skin ruining the entire makeup.
- Always use sunscreen to protect your screen from getting oilier due to harmful sun rays.
- You can start using facial masks to treat oily skin.
Conclusion:
Finally, we are here at the end of the blog on makeup steps for oily skin. No matter what function you are attending or at which place you are going, using this makeup process will give you a long-lasting makeup look. You will not have to worry about melting or smudging the makeup products in the middle of an event.